
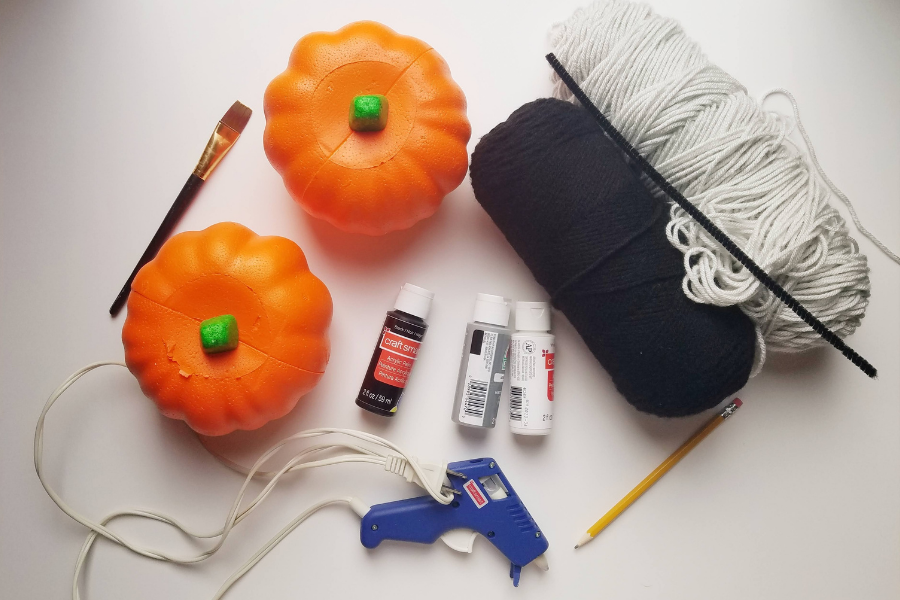
*Disclosure: This post may contain affiliate links which means if you click through and make a purchase I may earn a commission at no extra cost to you. All posts and products promoted are done so in good faith. Read my full disclaimer here. You will need:
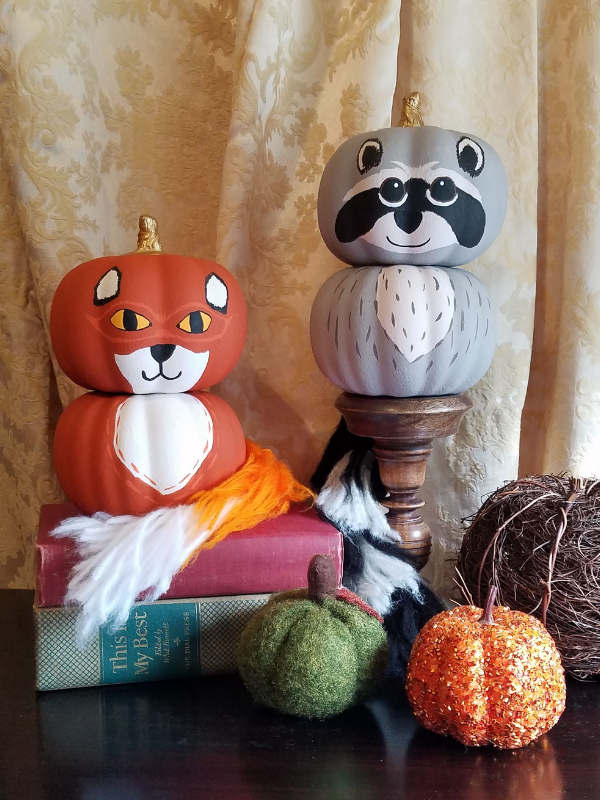
 Here's how to make it... Step 1 Remove the stem and paint both pumpkins. Step 2 Hot glue one pumpkin on top of the other. 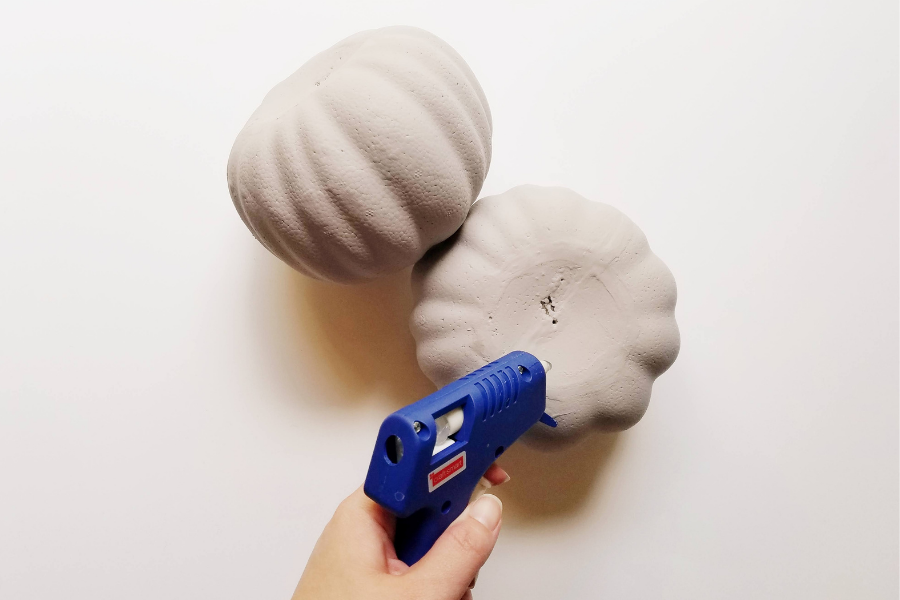 Step 3 Draw on your animal's face and tummy then paint it on. 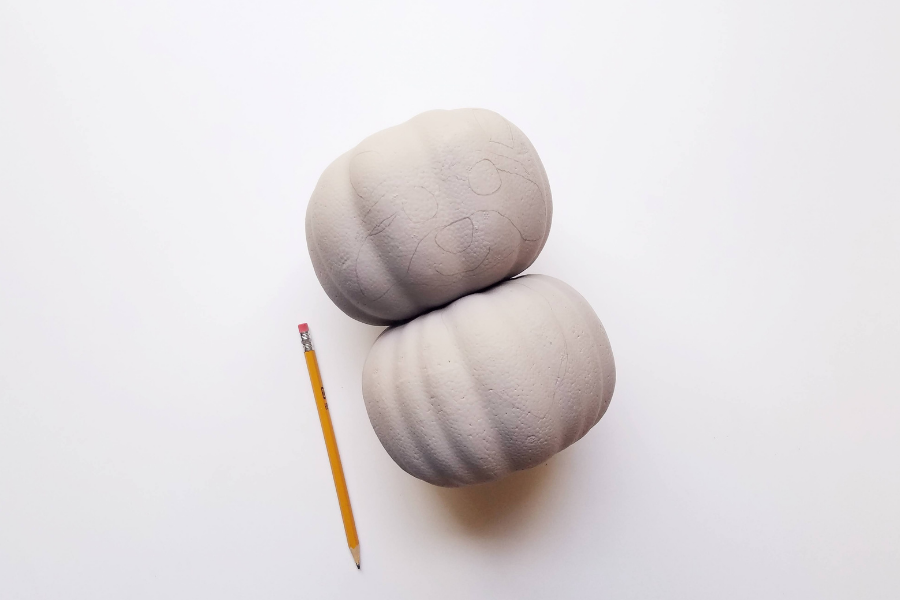 Step 4 To make the tail, begin cutting 6-8 inch pieces of yarn (this is a little long, but it will be trimmed). Begin tying the pieces of yearn onto the pipe cleaner with a simply knot. Leave a 1 inch space at the top so the tail can be inserted into the pumpkin. When you get to the bottom, leave about a 1/2 inch space and fold it back and twist it in order to stop the yarn from sliding off. 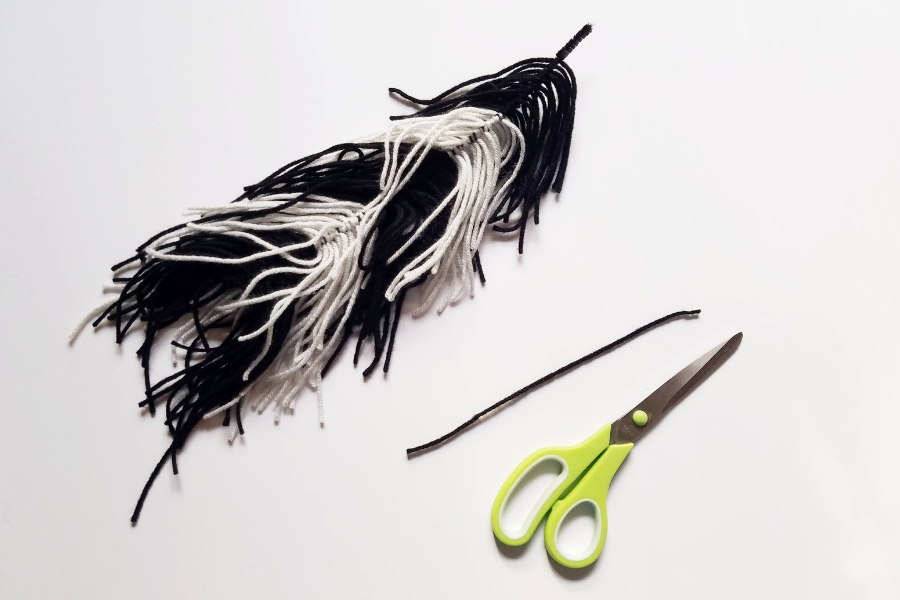 Step 5 Use a firm bristle brush to start fluffing the yarn. Then give it a trim to clean up the extra long strands and shape it up the way you like. 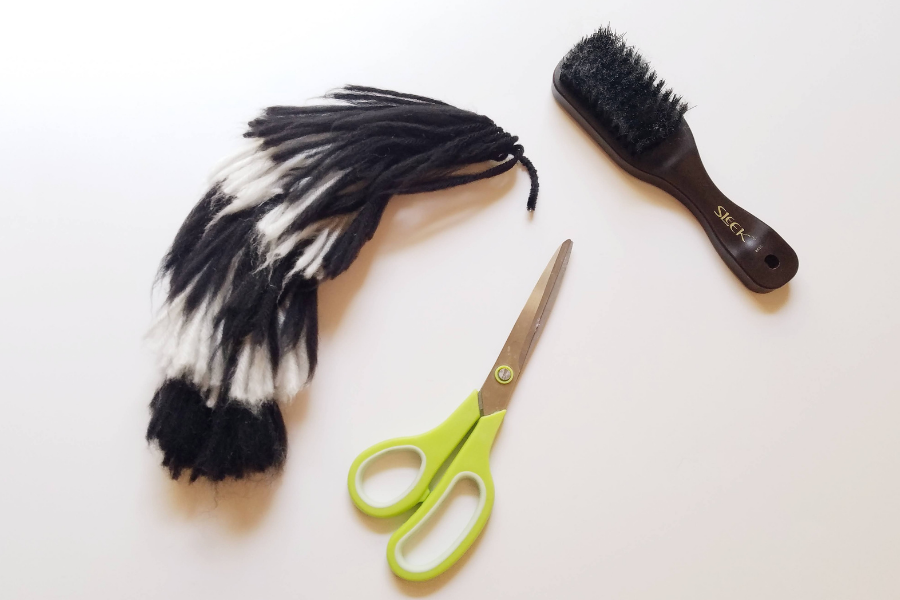 Step 6 Insert the pipe cleaner tail into the back of the bottom pumpkin. All you have to do is gently push it in. 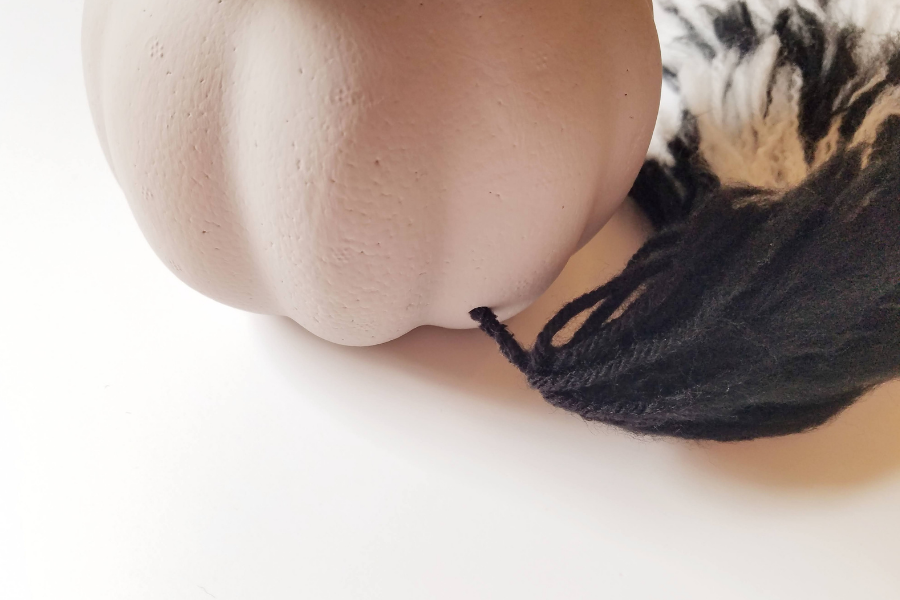 Step 7 To make the clay pumpkin stem, shape about half of the package into a pumpkin stem and then give it a little twist. Bake according to the package directions and then paint it if you like.  Step 8 Glue the stem to the top. I chose Super Glue gel because I didn't want to take a chance on hot glue oozing out of the sides, but I think hot glue would have worked perfectly well. The Super Glue worked, but I had to use a lot of it to fill some open space between the clay and pumpkin. 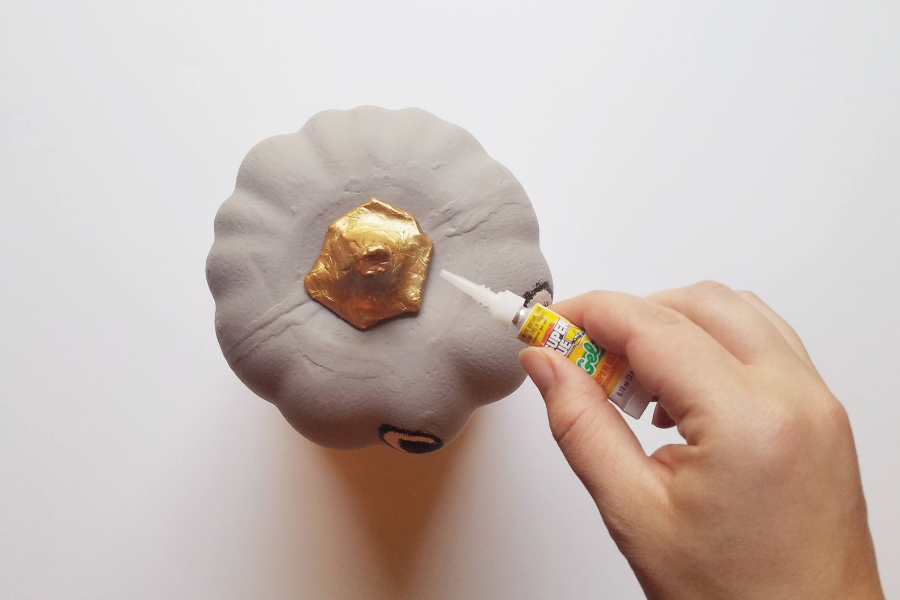 And done! Such cute and classy little pumpkins. Thank you so much to Grandin Road for the inspiration. Now, with Halloween coming up all I have to do is pop a little witch hat on them and they've become double duty decorations. 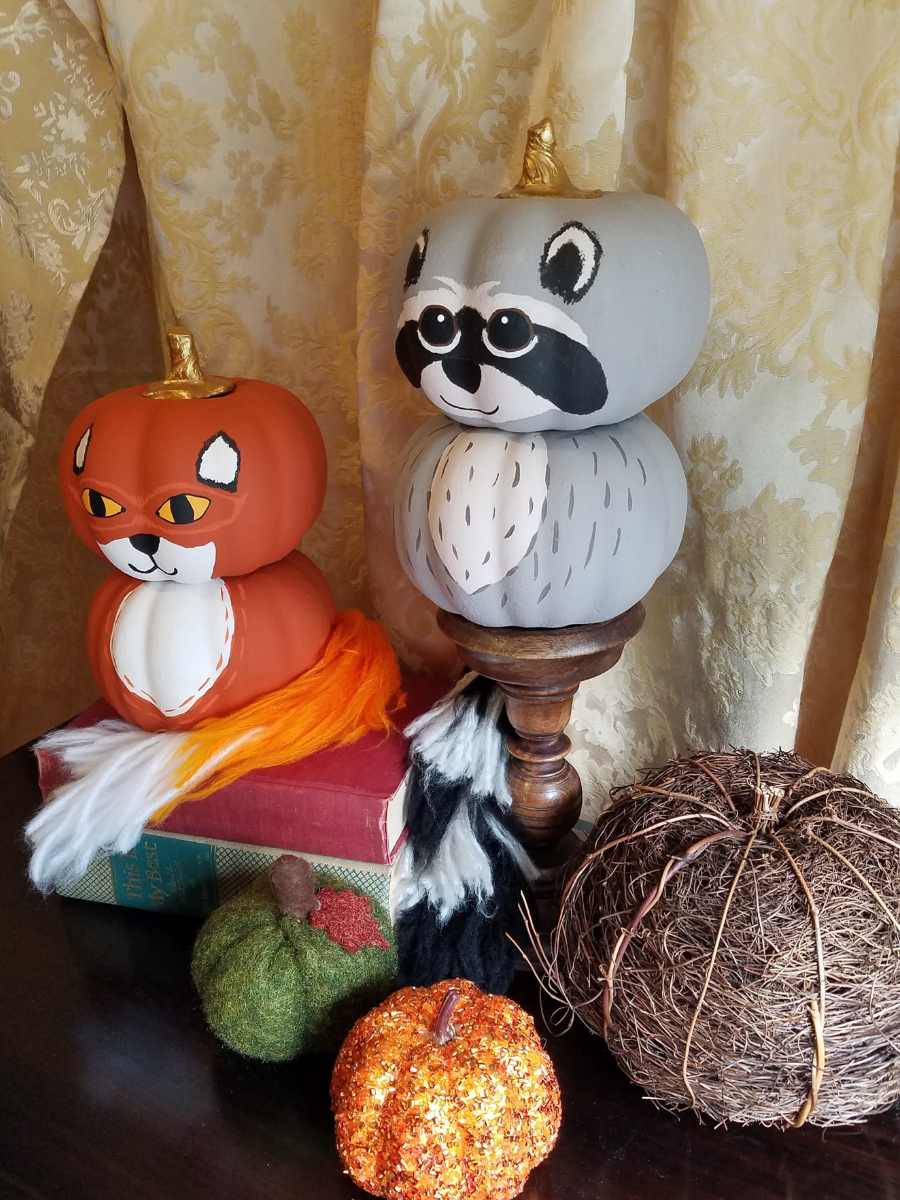 You Might Also Enjoy
0 Comments
Leave a Reply. |

Hi there, my name’s Tayler. I’m cultivating a fun and sophisticated life in the Midwest with my hubby and two kids. I love to share comfy, yet classy outfits, charming home decor, and easy tips for living a more beautiful life.
Elevate Your Vibe and Enrich Your Life with my newsletter.
SocialShop
MY AMAZON 
As an Amazon Associate I earn from qualifying purchases.
On Instagram
Categories
All
|


Site powered by Weebly. Managed by Bluehost