
I'm not going to call this piece of Halloween decor easy, but definitely worth it. Really though, it wasn't too difficult it just required a bit of effort. What you will need...
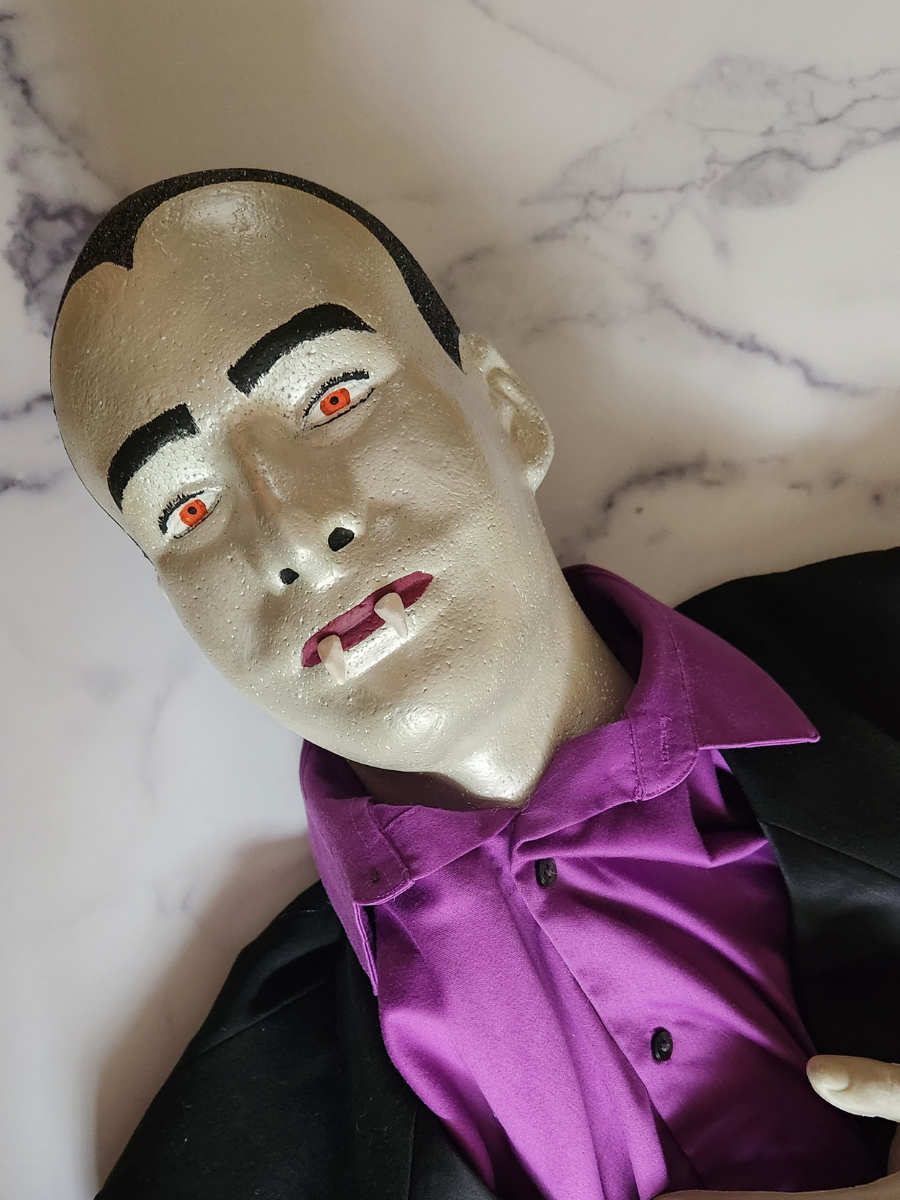
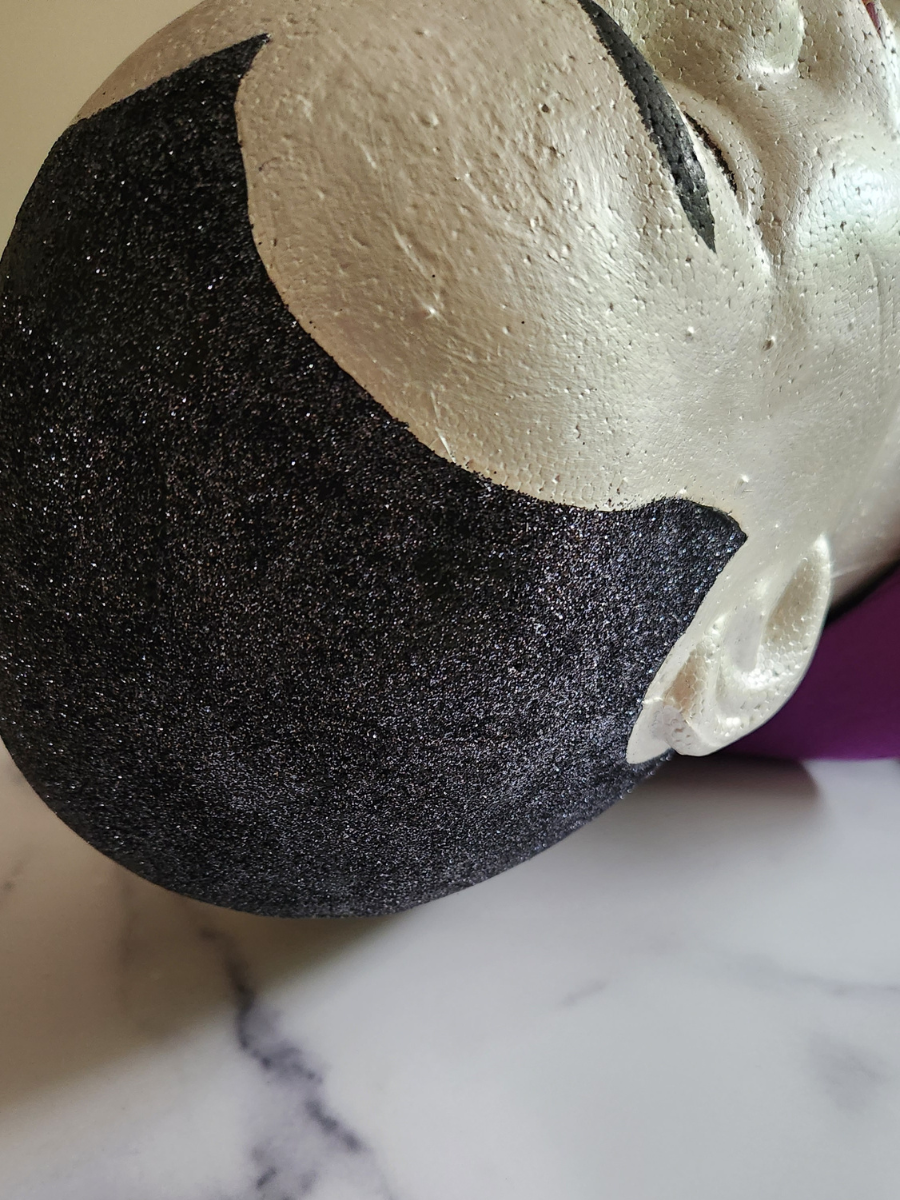
Here's how to make it... Step 1 Go ahead and get started painting the styrofoam head. I painted a light grey base allover and then went over that with pearly white to give his dead skin that elegant Vampire-y sheen. For his hair, I painted black then applied black sparkly glitter which looks fabulous. It's up to you what colors you choose to use here, but it's important to paint on all of the facial features for a realistic look. Remember to paint on the eyebrows, nostrils, lips, and for the eyes, the white, the iris, and short eyelashes. I used some of my kids air dry clay to craft my own fangs. If you use this method, be sure to put the fangs up to his lips where you would like to attach them while the clay is still moldable. This way you can make sure that they lay perfectly over the lips when they are dry and you go to superglue them on.
Step 2 You will need two even pieces of ribbon to sew on as "feet". This is how he will hang upside down. I used my sewing machine, but if you don't have one simply use a needle and thread to hand sew the ribbon into the bottom of the pants. Just be sure to make it super strong. 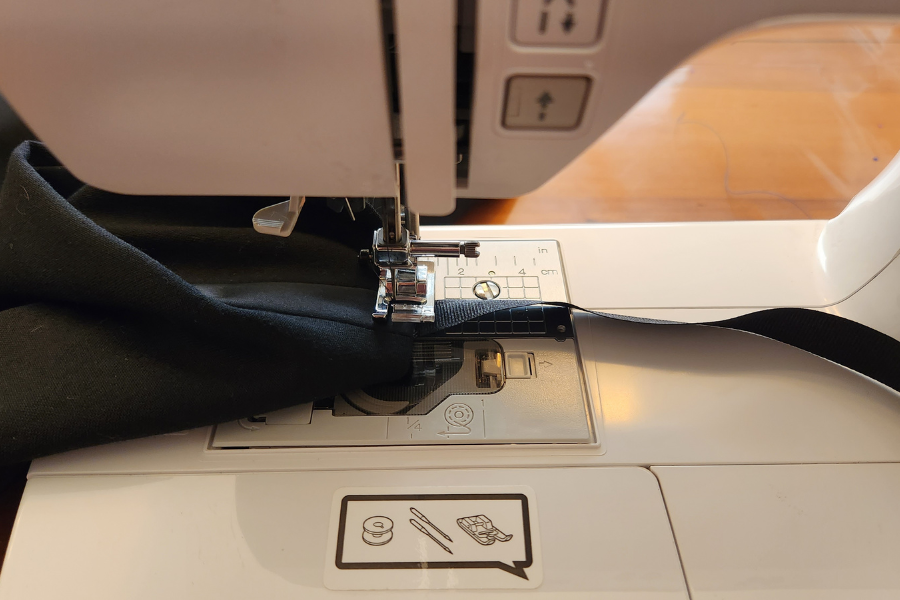 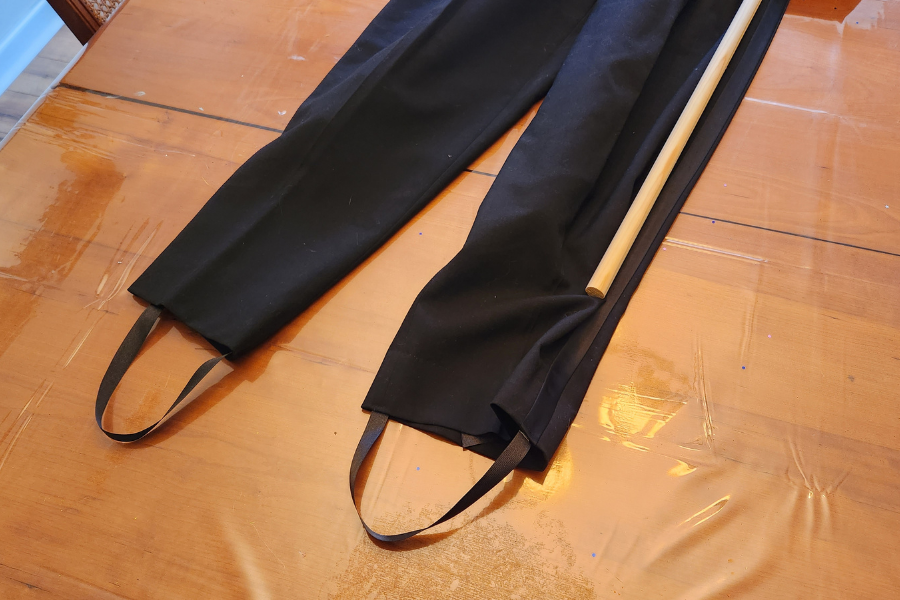 Step 3 If you are using a jacket and pants lay those two pieces out flat as they would look if they were being worn. Now, it is time to glue these pieces together. I attached the pants to the bottom of the jacket with a lot of hot glue. Tip It is important to measure your porch or the area you will want to hang this vampire. Then make sure that the length of the outfit combined with the length of the head will fit properly into your space. Account for a few extra inches of ribbon for "feet" so that you can hang him upside down.  Step 4 Now that the suit is all glued together, it's time to insert the shirt into the jacket. I glued the backside of the shirt to the jacket with a lot of hot glue. Leave the buttons open and the arms pulled out for stuffing this guy up. Step 5 Next, we cut the pool noodles. I took off about 6 inches from each pool noodle. This 6 inch piece will be used as the forearm. The leftover long pieces of pool noodle will be the torso and upper thigh. It is ok that the pool noodle will not be the entire length of the Vampire's leg. A little filling will suffice. Before I cut my pool noodles, I first spray painted them black so that the lime green color would not stand out. This year I saw that the Dollar Tree has pool noodles in orange, purple, and black. 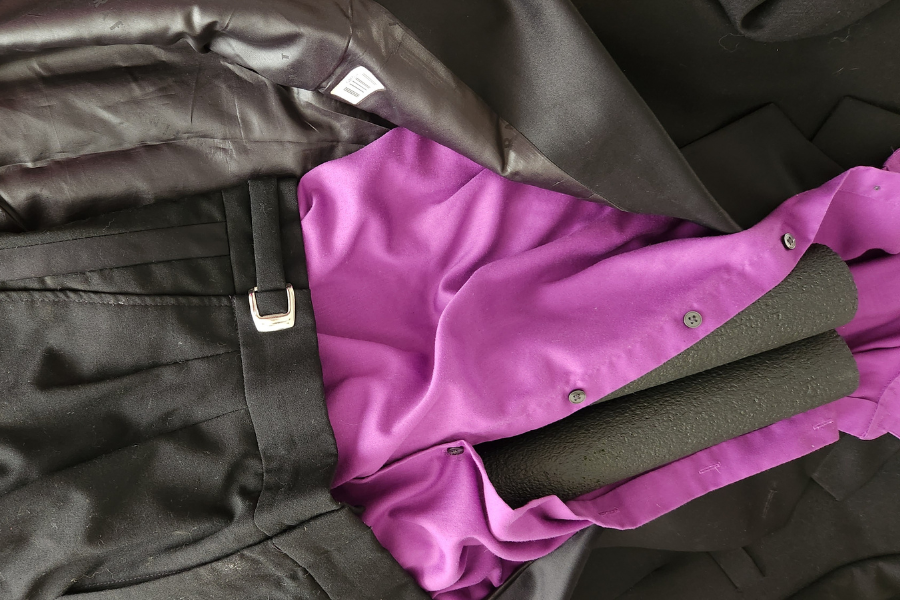 Step 6 Now insert the 6 inch "forearm" noodles into the shirt sleeves and hot glue them to the shirt. You will be inserting the zombie hands into the pool noodle hole so keep this in mind. My zombie hands had some fabric attached so I needed to be able to stuff the fabric into the jacket, but over the shirt. I didn't do this until the end though. Step 7 Now it is time to attach the head. Once it is all painted, it is time to attach it to the wooden dowel rod. This is where I messed up a little. I used hot glue like crazy unaware of how it would melt the styrofoam. Rookie mistake. If I could go back in time I would use liquid nails to glue the head to the dowel rod. The styrofoam head comes with a hole in the base. This method did, however, work and the hot glue is holding up well. Once the glue is dry and the head is all sturdy and sealed up you can stick this dowel rod right into one of the pool noodles. I had to go back and glue the dowel rod to the pool noodle with a little hot glue. Tip I used a 3/4 inch dowel which fit nice and snug into the pool noodle. But you should measure and check yours first to be sure that it will fit properly. 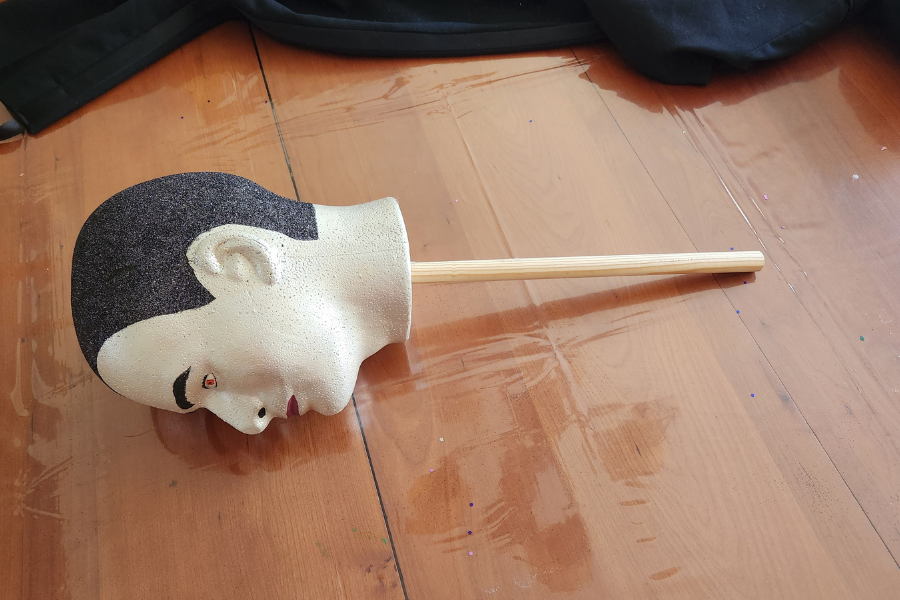 Step 8 Now that the head is attached you can line the neck up to the shirt collar. Carefully begin hot gluing the pool noodles to the backside of the shirt, inside the shirt. Then glue the shirt collar to the Vampire's neck. Next you can button up the shirt buttons. I hot glued the front inside of the jacket to the shirt to help reinforce the entire piece. Step 9 Now you can insert the zombie hands. I used these from Amazon which have a plastic stake at the base for inserting into the ground. These fit nice and snug in the pool noodle. I then hot glued the zombie fabric into the jacket sleeve. Bend his arms so that he is crossing his hands together over his chest. I used superglue to attach the hands together, but this didn't work out. I ended up using a black zip tie over his ring finger to hold his two hands together. I did not glue the hands to the shirt, just in case I ever need to open him up. All in All... This outdoor Halloween decoration really is impressive as we even had people taking pictures with this Vampire while trick or treating. This classy ghoul is certainly a fun way to elevate your Halloween decor. Pin for Later!  You may also enjoy...
1 Comment
|

Hi there, my name’s Tayler. I’m cultivating a fun and sophisticated life in the Midwest with my hubby and two kids. I love to share comfy, yet classy outfits, charming home decor, and easy tips for living a more beautiful life.

Elevate Your Vibe and Enrich Your Life with my newsletter.
SocialShop
MY AMAZON 
As an Amazon Associate I earn from qualifying purchases.
On Instagram
Categories
All
|

Site powered by Weebly. Managed by Bluehost